IoT with Blazor on Raspberry Pi Part 4 - SignalR

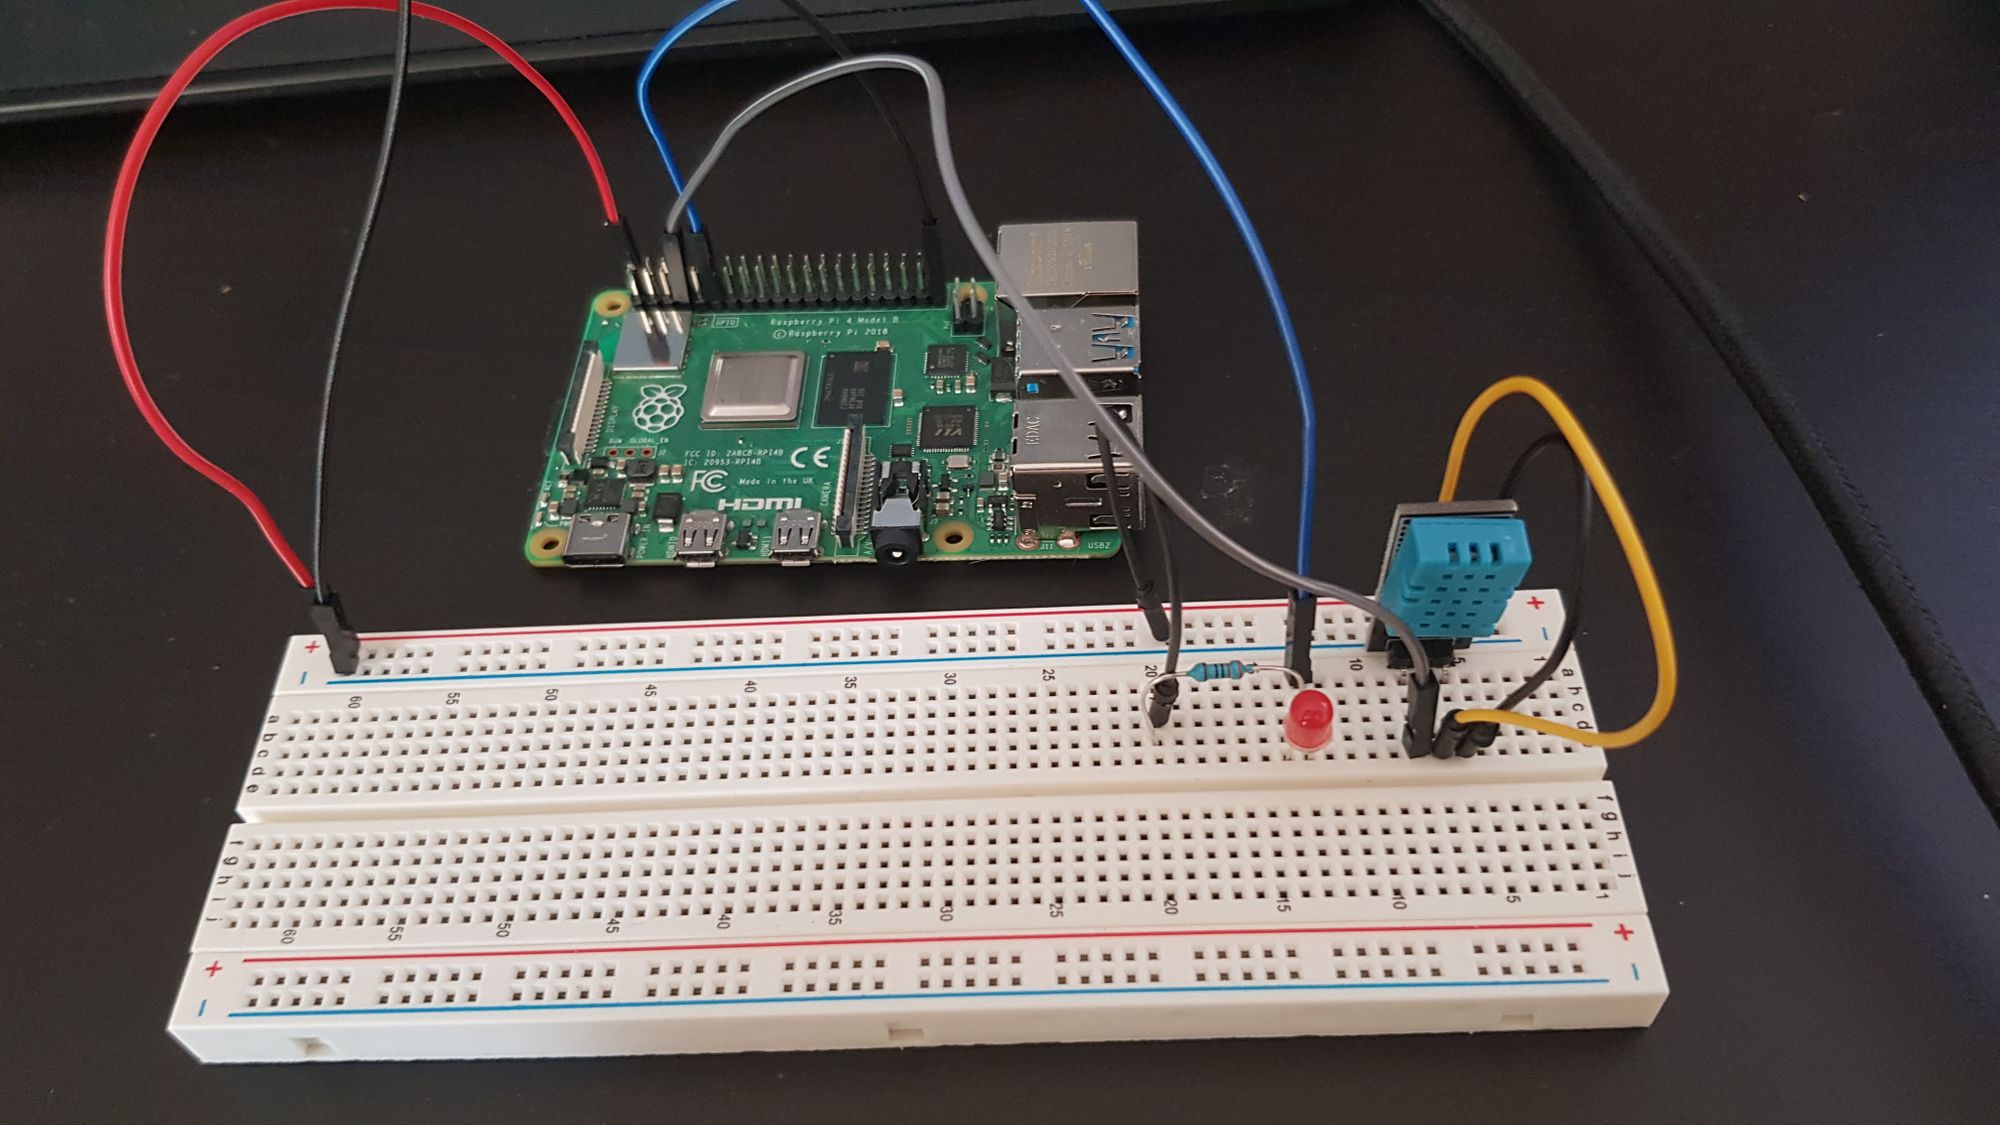
Hopefully, you read Part 3 of this series and thus have a basic LED under your control, congrats!
Add SignalR Extensions
To ensure we can write everything in C#, add a reference to the Client project for the Blazor.Extensions.SignalR package: <PackageReference Include="Blazor.Extensions.SignalR" Version="0.4.0" />
In the future, this will be built-in, but for now, we must add it explicitly.
Add imports
To reference the SignalR extensions in the razor views, we need to add a @using Blazor.Extensions statement to the Client/_Imports.razor file.
Add HubConnectionBuilder
In the Client/Startup.cs file, add the using Blazor.Extensions; statement, and update the ConfigureServices method to add a transient HubConnectionBuilder to DI
public void ConfigureServices(IServiceCollection services)
{
    services.AddTransient<HubConnectionBuilder>();
}
Update razor view
Now let's update the Pages/Led.razor file to hook up to SignalR.
@page "/led"
@inject HttpClient Http

<h1>Led Toggle</h1>

<p>Current On: @toggle</p>
<button class="btn btn-primary" @onclick="ToggleLed">Toggle</button>

@code {
    bool toggle = false;
    [Inject] private HubConnectionBuilder _hubConnectionBuilder { get; set; }
    private Func<bool, Task> handleSwitchStatus;

    protected override async Task OnInitializedAsync()
    {
        handleSwitchStatus += ReceiveSwitchStatus;
        var gpioConnection = _hubConnectionBuilder // the injected one from above.
        .WithUrl("/gpio", // The hub URL. If the Hub is hosted on the server where the blazor is hosted, you can just use the relative path.
        opt =>
        {
            opt.LogLevel = SignalRLogLevel.Trace; // Client log level
            opt.Transport = HttpTransportType.WebSockets; // Which transport you want to use for this connection
        })
        .Build(); // Build the HubConnection

        gpioConnection.On("ReceiveSwitchStatus", this.handleSwitchStatus); // Subscribe to messages sent from the Hub to the "Receive" method by passing a handle (Func<object, Task>) to process messages.
        await gpioConnection.StartAsync(); // Start the connection.
    }

    Task ReceiveSwitchStatus(bool arg)
    {
        toggle = arg;
        StateHasChanged();
        return Task.CompletedTask;
    }

    async Task ToggleLed()
    {
        toggle = !toggle;
        await Http.SendJsonAsync(HttpMethod.Post, "LED", toggle);
    }
}
Add the Hub to the server
With the client ready to go, let's add the Hub to the server project. Create a new Hubs folder in the project, and create the GPIOHub.cs file in the folder.
using Microsoft.AspNetCore.SignalR;
using System.Threading.Tasks;

namespace Blazor.Pi.Server.Hubs
{
    public class GPIOHub : Hub
    {
    }
}
Add SignalR and Map the Hub route
With the Hub created, let's update Startup.cs. Add using Blazor.Pi.Server.Hubs;, inside the ConfigureServices method add services.AddSignalR();, and then inside the Configure method update the app.UseEndpoints statement to map the newly created Hub.
app.UseEndpoints(endpoints =>
{
    endpoints.MapDefaultControllerRoute();
    endpoints.MapFallbackToClientSideBlazor<Client.Startup>("index.html");
    endpoints.MapHub<GPIOHub>("/gpio");
});
Update the controller
Now let's update the controller to use SignalR to inform the clients of the status change. Resolve the IHubContext<GPIOHub> from DI, and then update the Post method with _hubContext.Clients.All.SendAsync("ReceiveSwitchStatus", toggle);.
using Microsoft.AspNetCore.Mvc;
using Microsoft.AspNetCore.SignalR;
using Microsoft.Extensions.Logging;
using Blazor.Pi.Server.Hubs;
using System;
using System.Device.Gpio;
using System.Linq;

namespace Blazor.Pi.Server.Controllers
{
    [ApiController]
    [Route("[controller]")]
    public class LEDController : ControllerBase
    {
        private readonly int ledPin = 17;
        private readonly ILogger<LEDController> logger;
        private readonly IHubContext<GPIOHub> _hubContext;
        private readonly GpioController _controller;

        public LEDController(
            ILogger<LEDController> logger,
            GpioController controller,
            IHubContext<GPIOHub> hubContext
            )
        {
            _hubContext = hubContext;
            this.logger = logger;

            _controller = controller;
            if (!controller.IsPinOpen(ledPin))
            {
                controller.OpenPin(ledPin, PinMode.Output);
            }
        }

        [HttpPost]
        public void Post([FromBody] bool toggle)
        {
            _hubContext.Clients.All.SendAsync("ReceiveSwitchStatus", toggle);
            if (toggle)
            {
                _controller.Write(ledPin, PinValue.High);
            }
            else
            {
                _controller.Write(ledPin, PinValue.Low);
            }
        }
    }
}
Winning?
If the computing gods are kind, you should now have the ability to control your LED from any browser on your network and have all of them correctly reflect the status change. In the final part of this series, we will use all we've learned so far to read temperature and humidity data from our DHT sensor.