IoT with Blazor on Raspberry Pi Part 3 - the Code

Hopefully, you read Part 2 of this series and thus have everything installed and ready to go, congrats!
Create the project
From your SSH enabled VSCode, let's start by creating the project.
First off we create a folder for the project, then switch to that directory and enable it as a git repo (or your chosen source control), installing the WASM template before creating the project from the dotnet new command.


To be safe, I also make a commit to allow me to revert.

Add dependencies
As our blazor is going to be hosted client-side in the browser, we are handling the GPIO in the ASP.NET core host. So let's add the GPIO dependencies to the Server project with dotnet add package System.Device.Gpio --version 1.0.0-* and dotnet add package IoT.Device.Bindings --version 1.0.0-*.

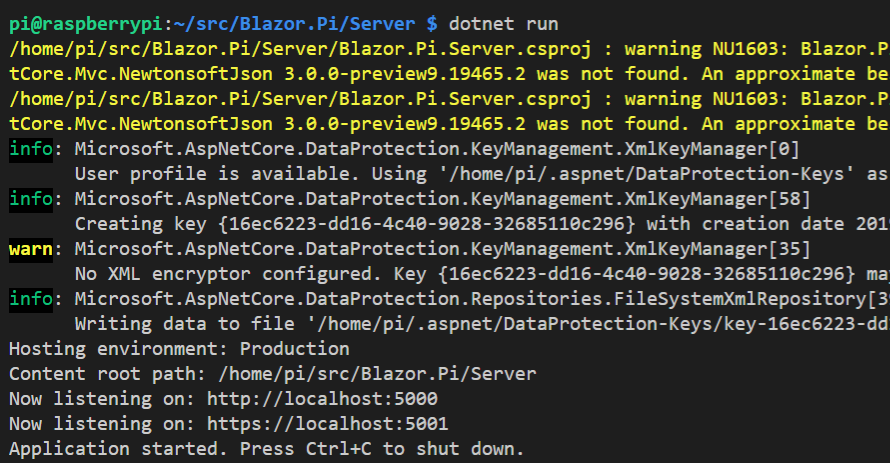
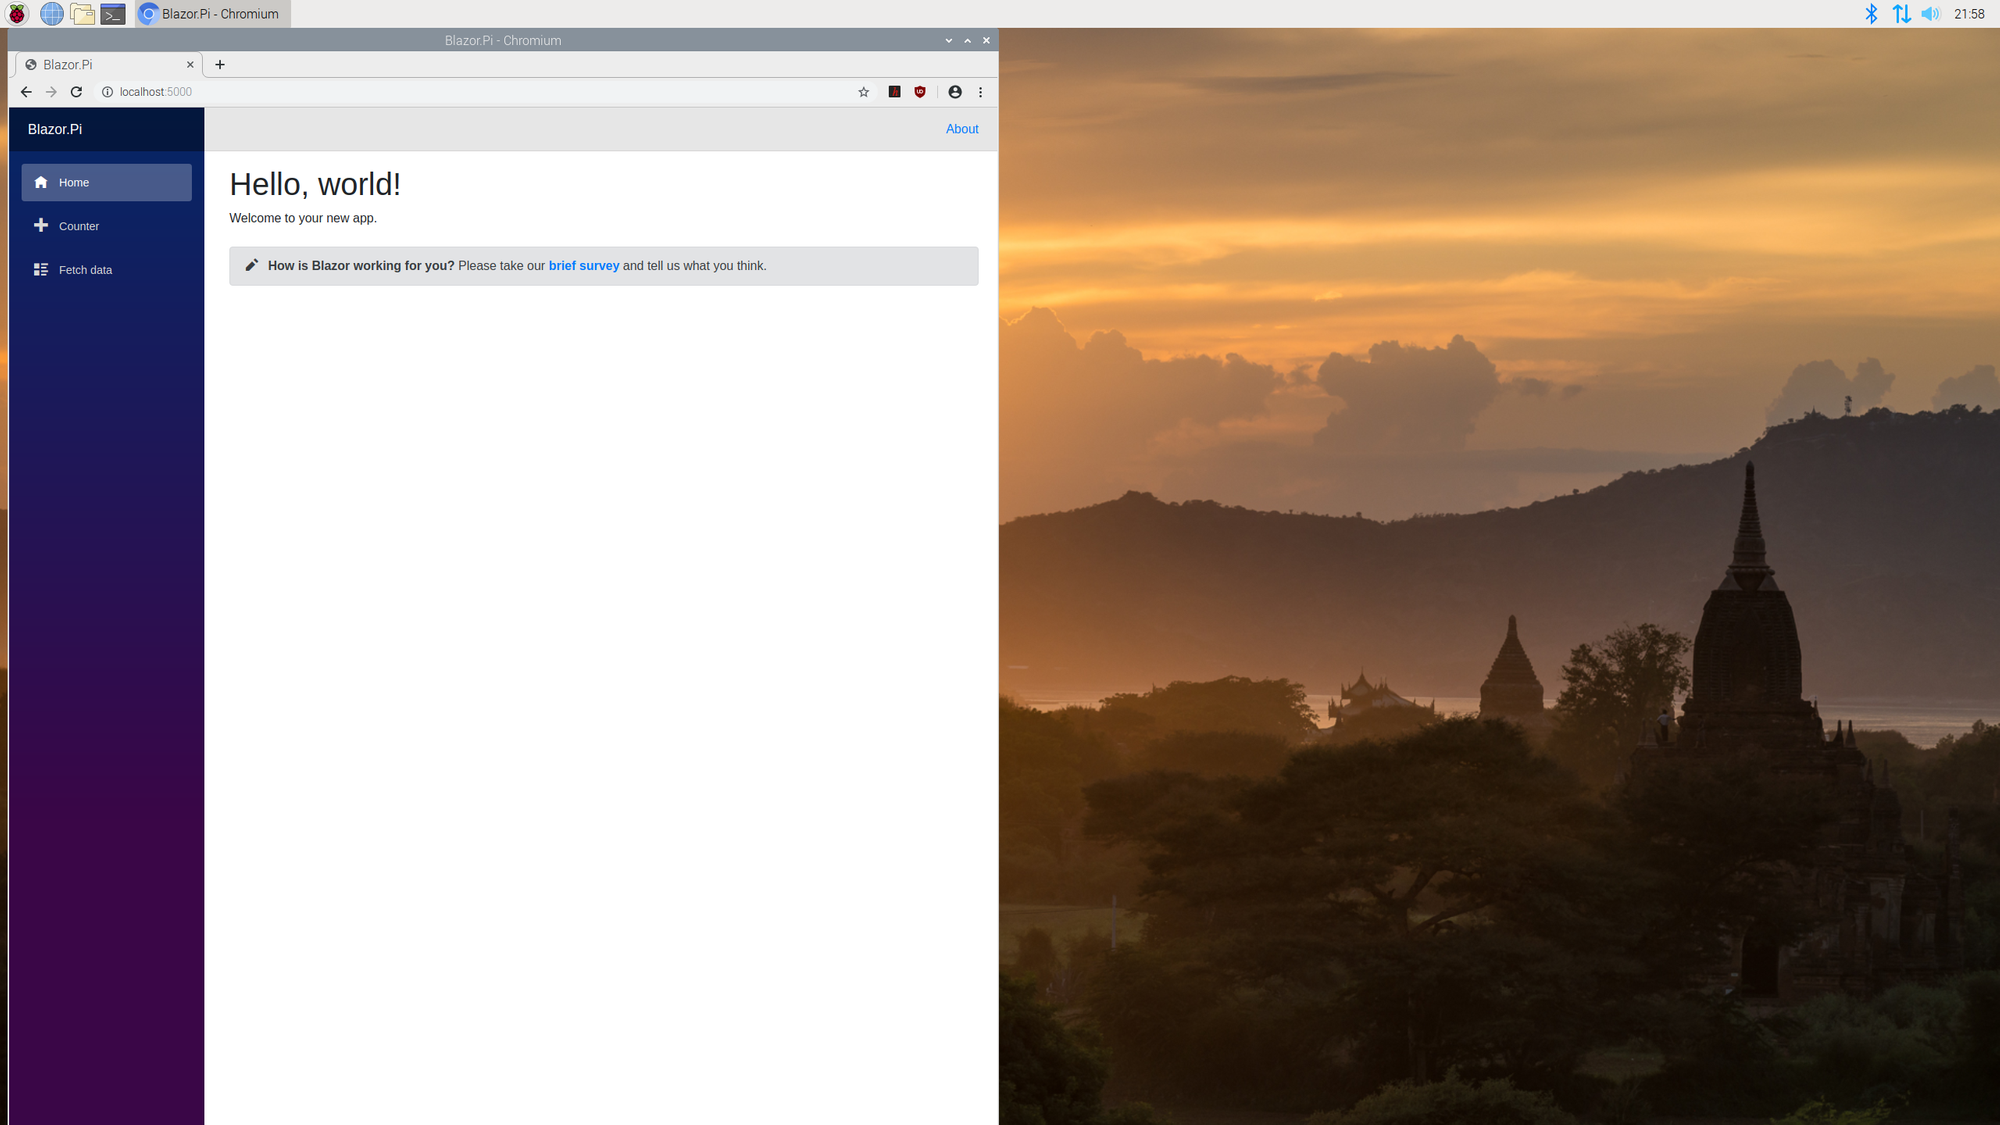
Now, let's do a sanity check and make sure our project even runs. Run the server application with dotnet run and then switch to the Pi and check you get the default index page
Allow access from the network
By default the webserver only listens on localhost, to allow you to open the Blazor site from your development machine, add .UseUrls("HTTP://*:5000;https://*:5001") to the BuildWebHost method in Program.cs
public static IWebHost BuildWebHost(string[] args) =>
            WebHost.CreateDefaultBuilder(args)
                .UseUrls("http://*:5000;https://*:5001")
                .UseConfiguration(new ConfigurationBuilder()
                    .AddCommandLine(args)
                    .Build())
                .UseStartup<Startup>()
                .Build();
Register the Gpio controller
In the Startup.cs file for the server, add using System.Device.Gpio; and inside the ConfigureServices method, add the GpioController as a singleton.
public void ConfigureServices(IServiceCollection services)
{
    services.AddMvc().AddNewtonsoftJson();
    services.AddSingleton<GpioController>();
    services.AddResponseCompression(opts =>
    {
        opts.MimeTypes = ResponseCompressionDefaults.MimeTypes.Concat(
            new[] { "application/octet-stream" });
    });
}
Add a Controller
In the Controllers folder in the server project, create a file called LEDController.cs and put this simple endpoint for checking that our client can make the most simple of actions, turning in LED on or off.
using System;
using System.Collections.Generic;
using System.Linq;
using System.Threading.Tasks;
using Microsoft.AspNetCore.Mvc;
using Microsoft.Extensions.Logging;
using System.Device.Gpio;
using Blazor.Pi.Shared;

namespace Blazor.Pi.Server.Controllers
{
    [ApiController]
    [Route("[controller]")]
    public class LEDController : ControllerBase
    {
        private readonly int ledPin = 17;
        private readonly ILogger<LEDController> logger;
        private readonly GpioController _controller;

        public LEDController(
            ILogger<LEDController> logger,
            GpioController controller
            )
        {
            _controller = controller;
            this.logger = logger;

            if (!controller.IsPinOpen(ledPin))
            {
                controller.OpenPin(ledPin, PinMode.Output);
            }
        }

        [HttpPost]
        public void Post([FromBody] bool toggle)
        {
            if (toggle)
            {
                _controller.Write(ledPin, PinValue.High);
            }
            else
            {
                _controller.Write(ledPin, PinValue.Low);
            }
        }
    }
}
The main thing to notice here is that we are receiving the GpioController from DI, and we have hardcoded the LED pin to 17 private int pin = 17;.
Add the Blazor client view.
Now in the Client Project, edit Shared/NavMenu.razor to add a navigation link for the Led view.
<li class="nav-item px-3">
    <NavLink class="nav-link" href="led">
        <span class="oi oi-list-rich" aria-hidden="true"></span> LED
    </NavLink>
</li>
With the navigation link added, create a new razor view under the Pages folder called Led, e.g. Pages/Led.razor and inside add the following code.
@page "/led"
@inject HttpClient Http

<h1>Led Toggle</h1>

<p>Current On: @toggle</p>
<button class="btn btn-primary" @onclick="ToggleLed">Toggle</button>

@code {
    bool toggle = false;

    async Task ToggleLed()
    {
        toggle = !toggle;
        await Http.SendJsonAsync(HttpMethod.Post, "LED", toggle);
    }
}
Finally, try building the server project to ensure we haven't missed anything.
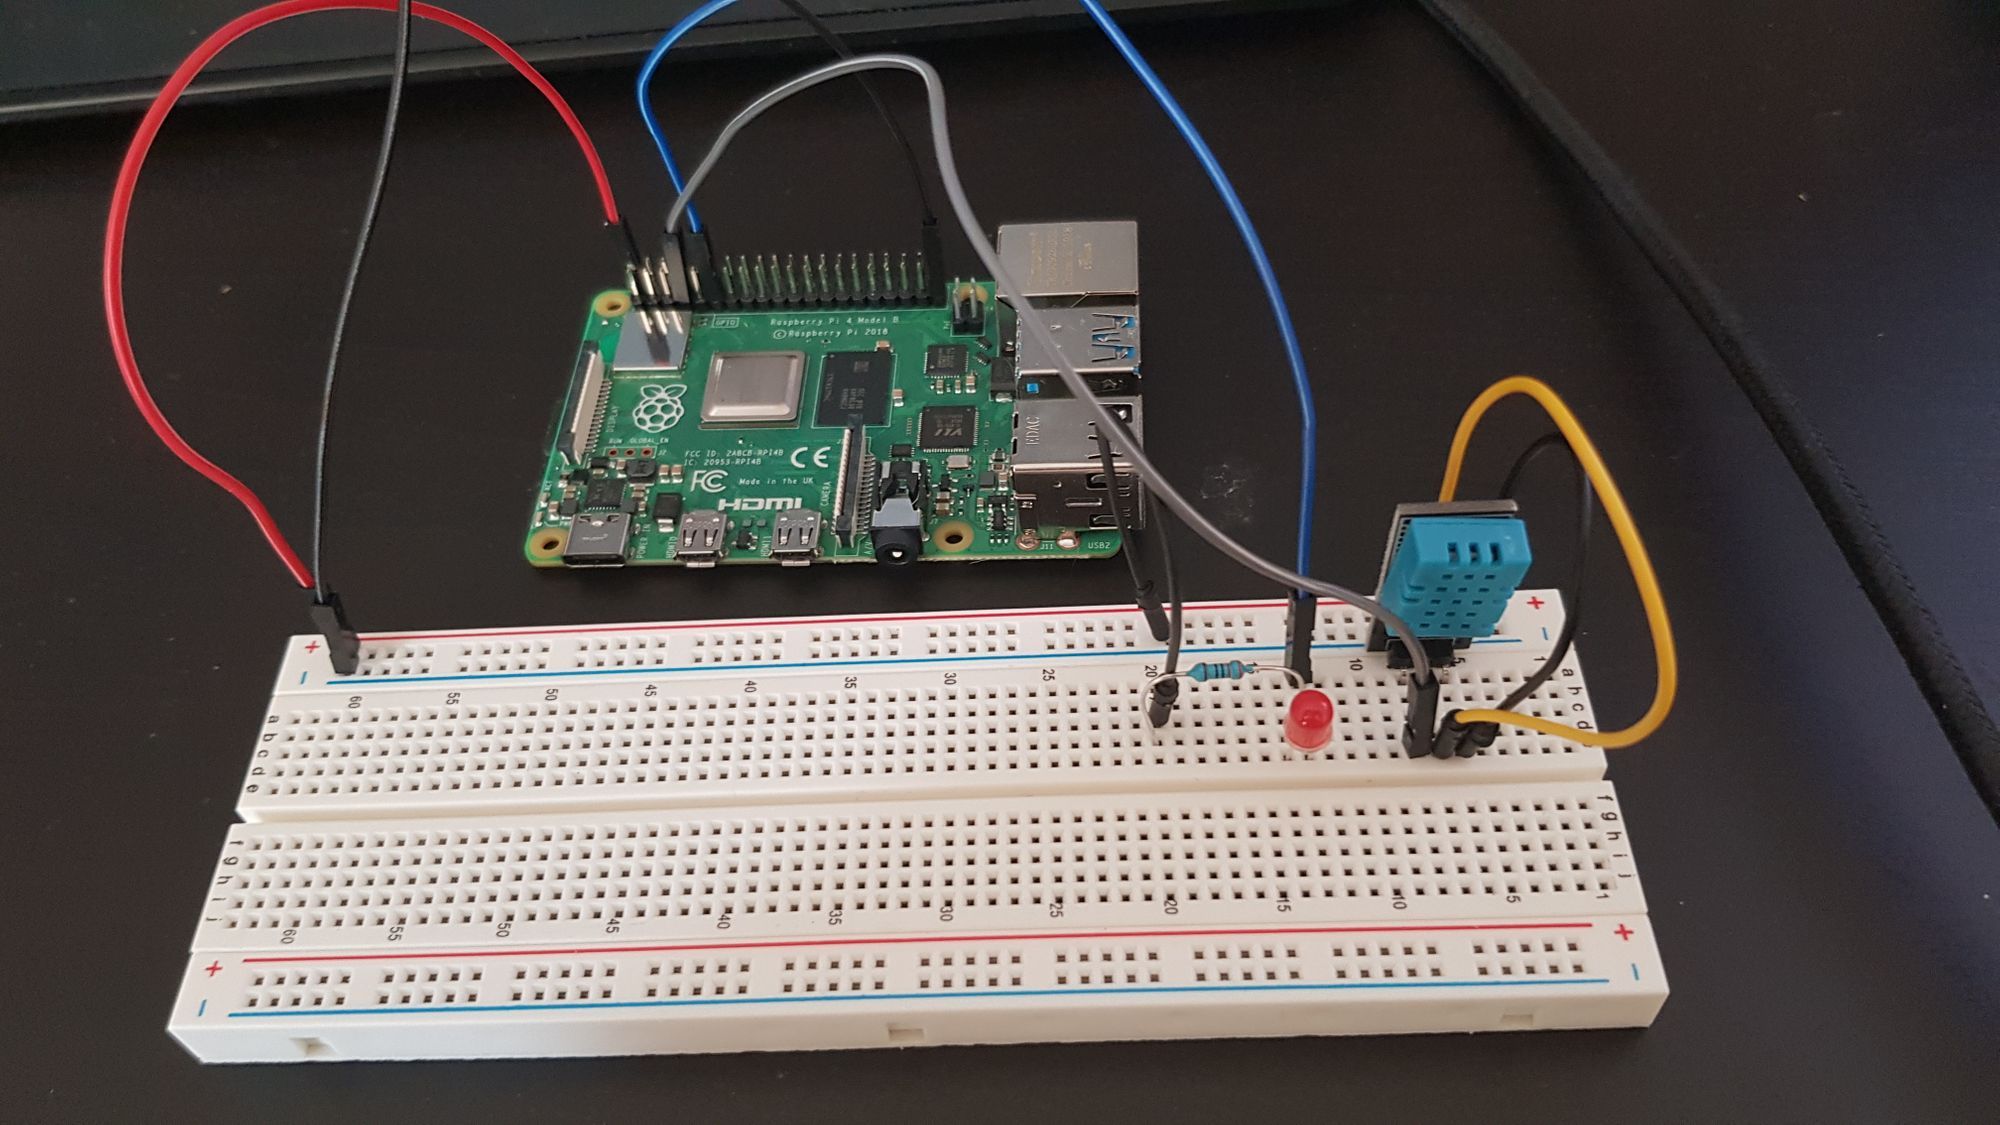
Breadboard wired?
Before running the project and confirming the code works, make sure you have wired up to your LED and Sensor to the correct pins on the Pi.
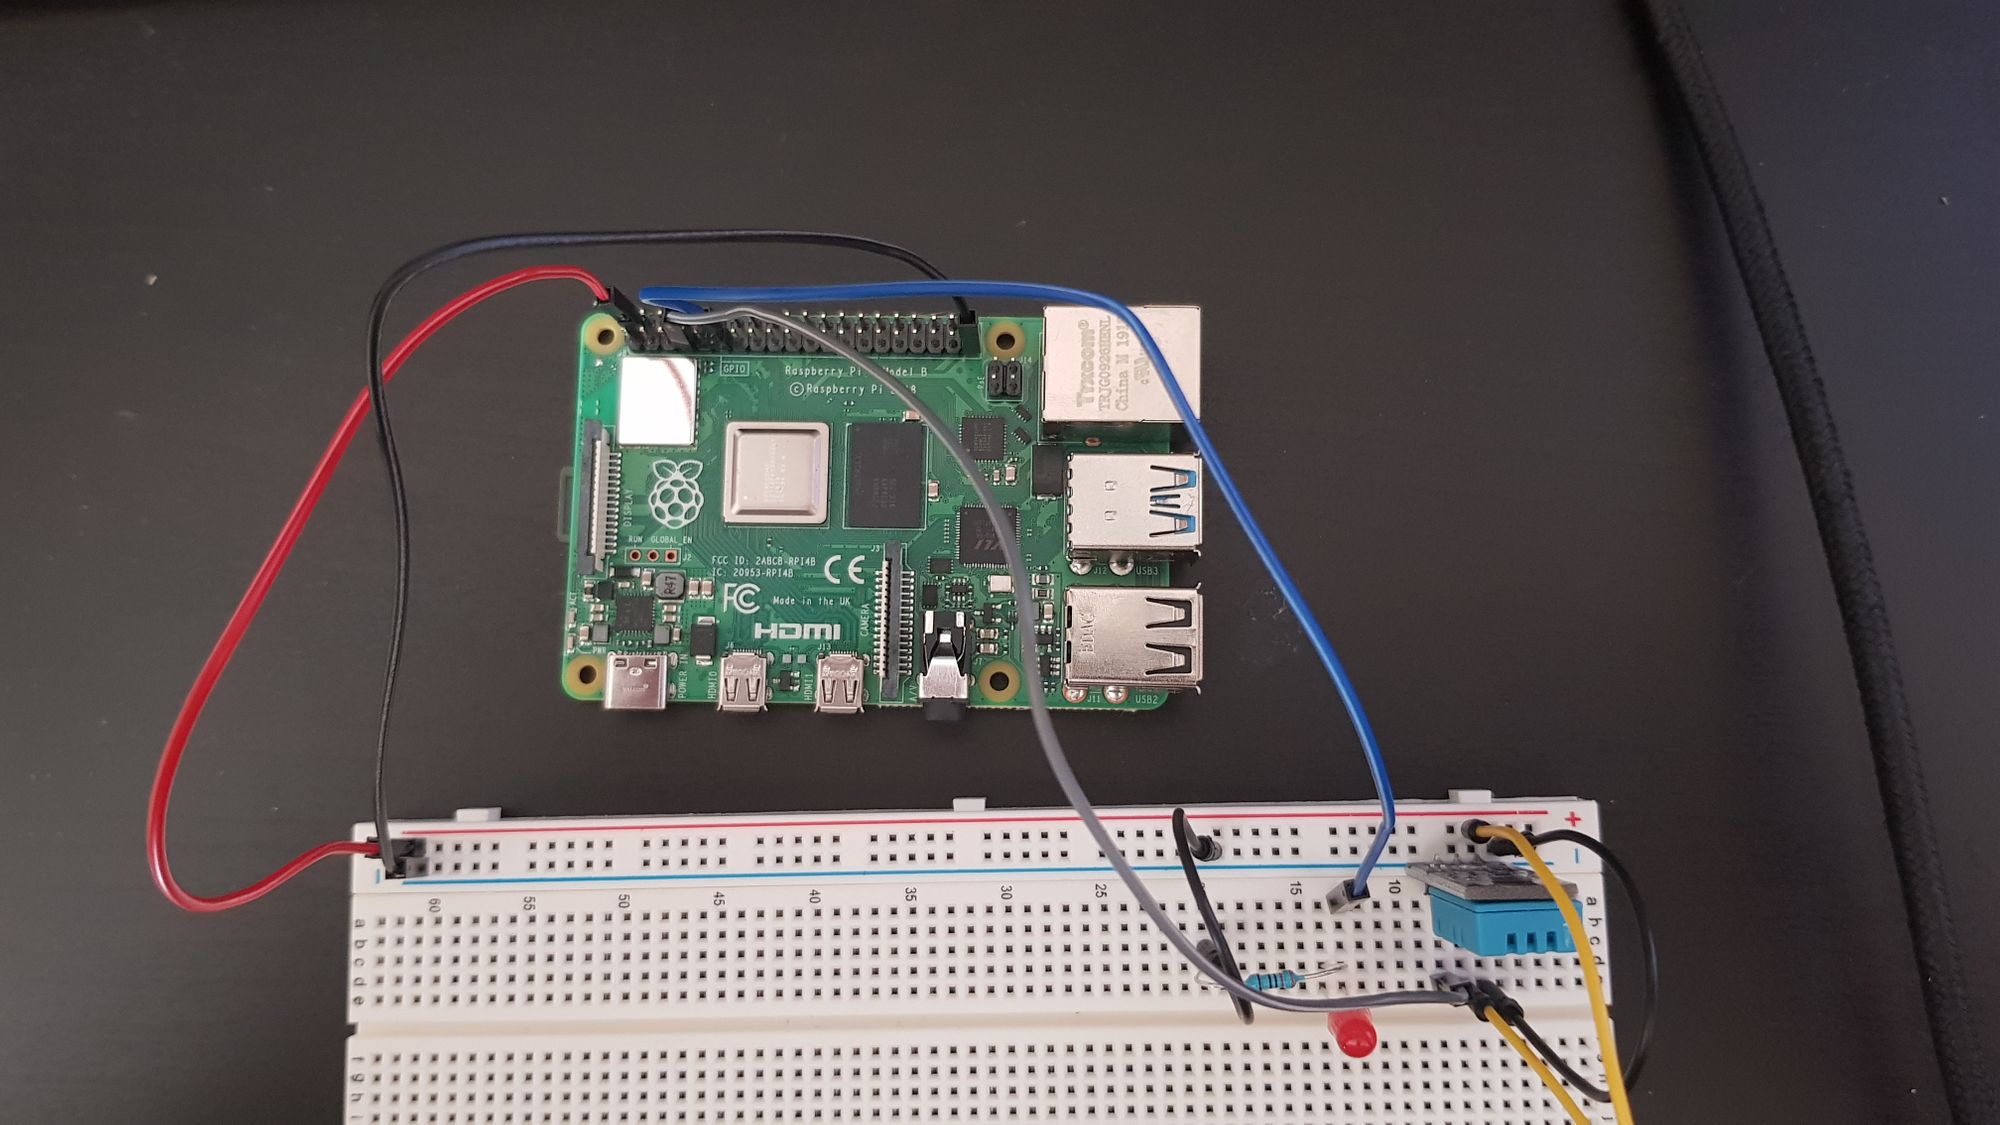

In this example, I have pin 1 on the first row as the positive, pin 4 on the 2nd row for the sensor data, pin 6 on the 2nd row for the LED switch, and pin 20 on the 2nd row for negative.
Success?
With the board wired up, let's confirm that we have got the basic LED switching working buy running the server and hitting the button on the new Led page.
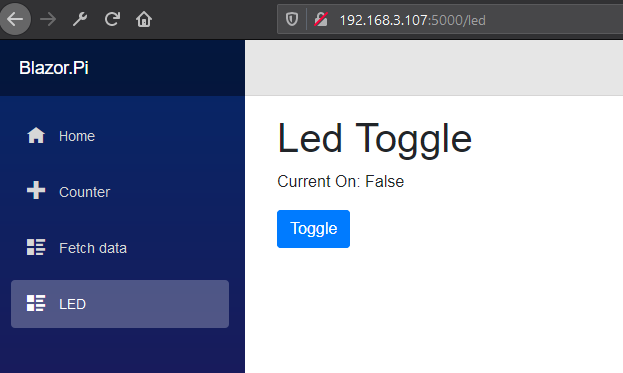
Hopefully, your LED was turning on and off matching the state of the onscreen message, but you may quickly have discovered, that if you load the page in another browser at the same time, the status remains off even when the LED is on. To fix this, we switch from tracking the status in the page, to broadcasting the status from the server using SignalR, ensuring that all consumers have the correct status. We will cover this in Part 4