Deploying Nano Server

I've been at Microsoft Ignite all week, and despite Nano being released with Server TP 2 a few days ago, I hadn't yet had a chance to try it out, partially due to the sheer amount I've had to take in, but also due to the complete lack of a stable internet connection anywhere I have been.
What is it?
If you haven't heard yet, Nano server represents one of the biggest changes in Microsoft's server offering's since the NT days. If you want a full overview I highly recommend you check out Jeffery Snover and Andrew Mason's introduction session, but if you just want the highlights I think one point is more than enough, of the 20+ Critical security bulletins for Server standard last year, only 2 would have applied to Nano, as a dev who is more the happy doing everything in powershell I was sold.
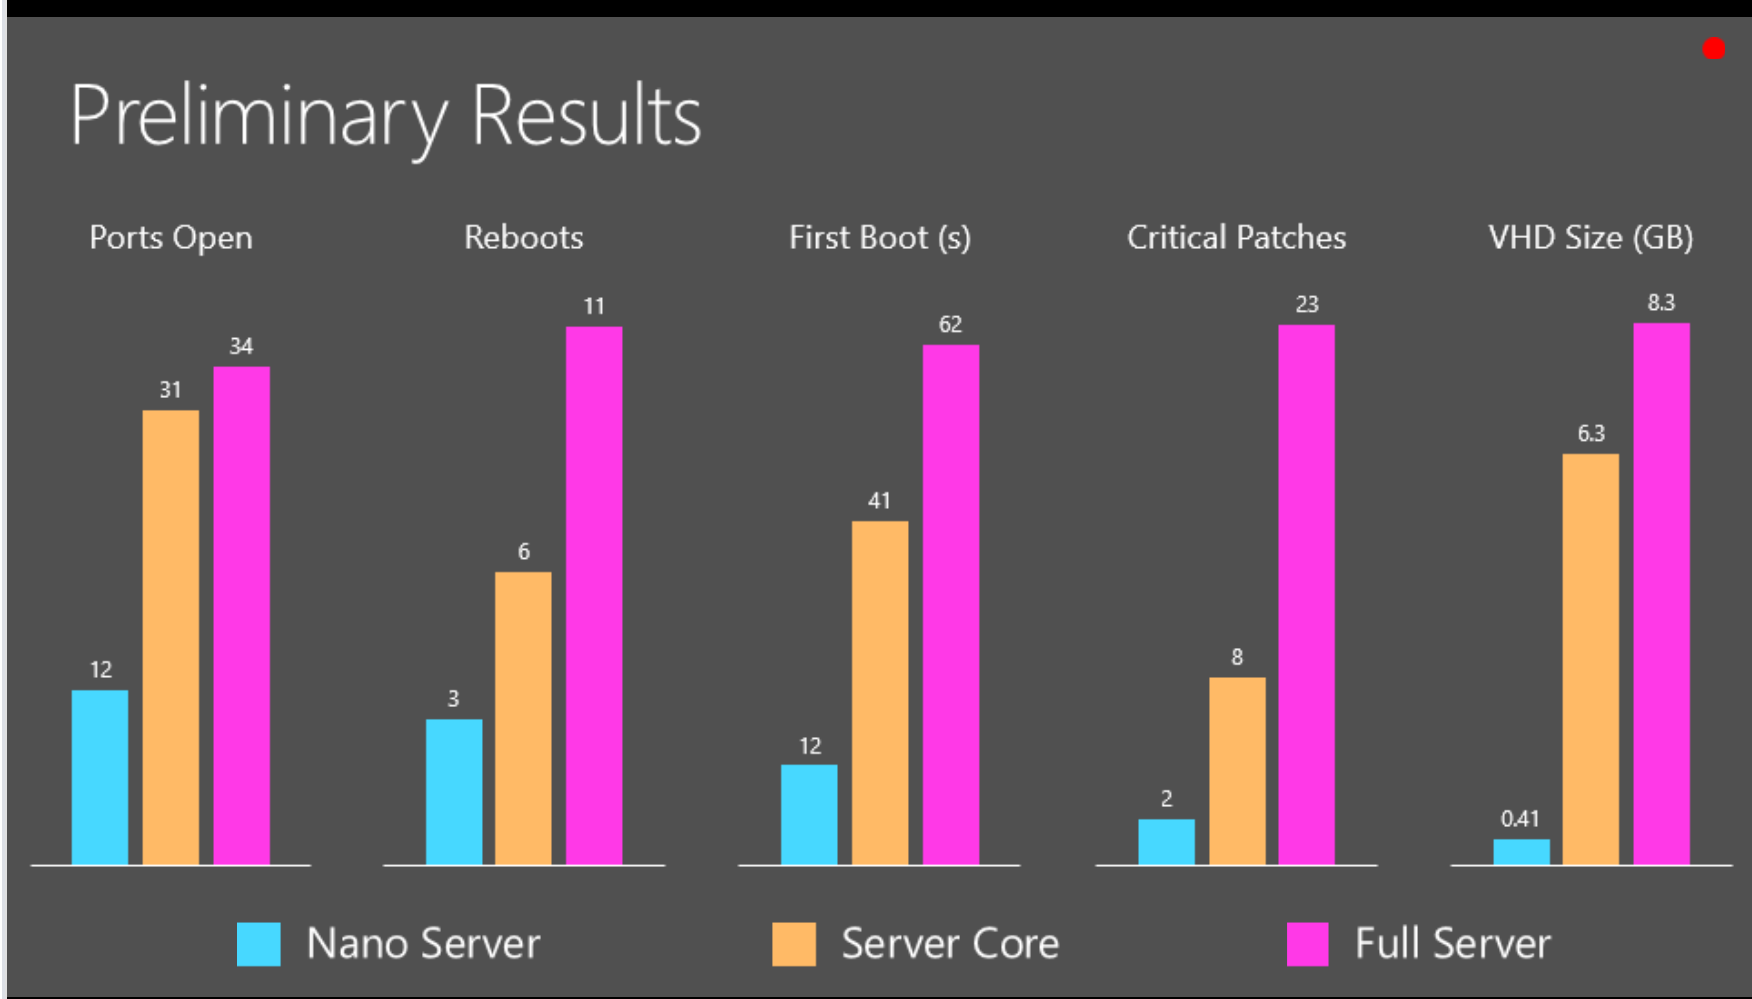
the above slide also shows comparisions for default open ports, reboots per year(which they said they are still trying to lower to 2 or less), intial boot time, critical patches and base VHD size
How to get started
This guide is for a local VM nano server running on hyper-v, although you should be able to use the same principals for a remote host.
Enable-PSRemoting
As all mamangement is done remotely for Nano server, make sure you have enabled powershell remoting on your client, I had forgotten to do so on my laptop and the errors you get will appear to suggest it's an issue with the machine you are trying to connect too, rather than the service is not running on your machine.
Enable-PSRemoting -Force
Get the bits
First off you will need the Windows Server Technical Preview 2 which contains the Nano Server wim.
Once you have the iso, you will need to grab some bits from it. If like me you are using Windows 8 or above, you can simply double clice the ISO to mount it as a virtual drive.

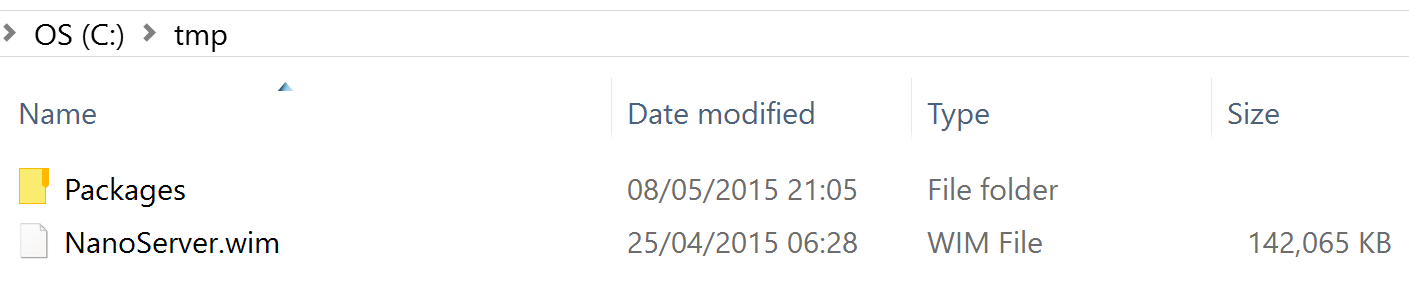
Copy the Nanoserver.wim and packages folder from the NanoServer folder to a local folder, in my case that was c:\tmp
Next you will need a script to convert the wim file to a VHD, download Convert-WindowsImage.ps1 from the Script Center.
Be aware if you are running Windows 10 this script will fail to run due to an OS version check. Search for the "Test-WindowsVersion" function and simply change it to return $true
Make the VHD
I placed the script in the c:\tmp folder with the other files, now from a Windows PowerShell prompt, run Convert-WindowsImage.ps1 -Sourcepath (path to wim) -VHDPath (path to new VHD file) –VHDformat VHDX -Edition 1. This converts the .wim image to a VHD in the path you specify.
PS C:\tmp> .\Convert-WindowsImage.ps1 -SourcePath .\NanoServer.wim -VHDPath .\nanoserver.vhdx -VHDFormat VHDX -Edition 1
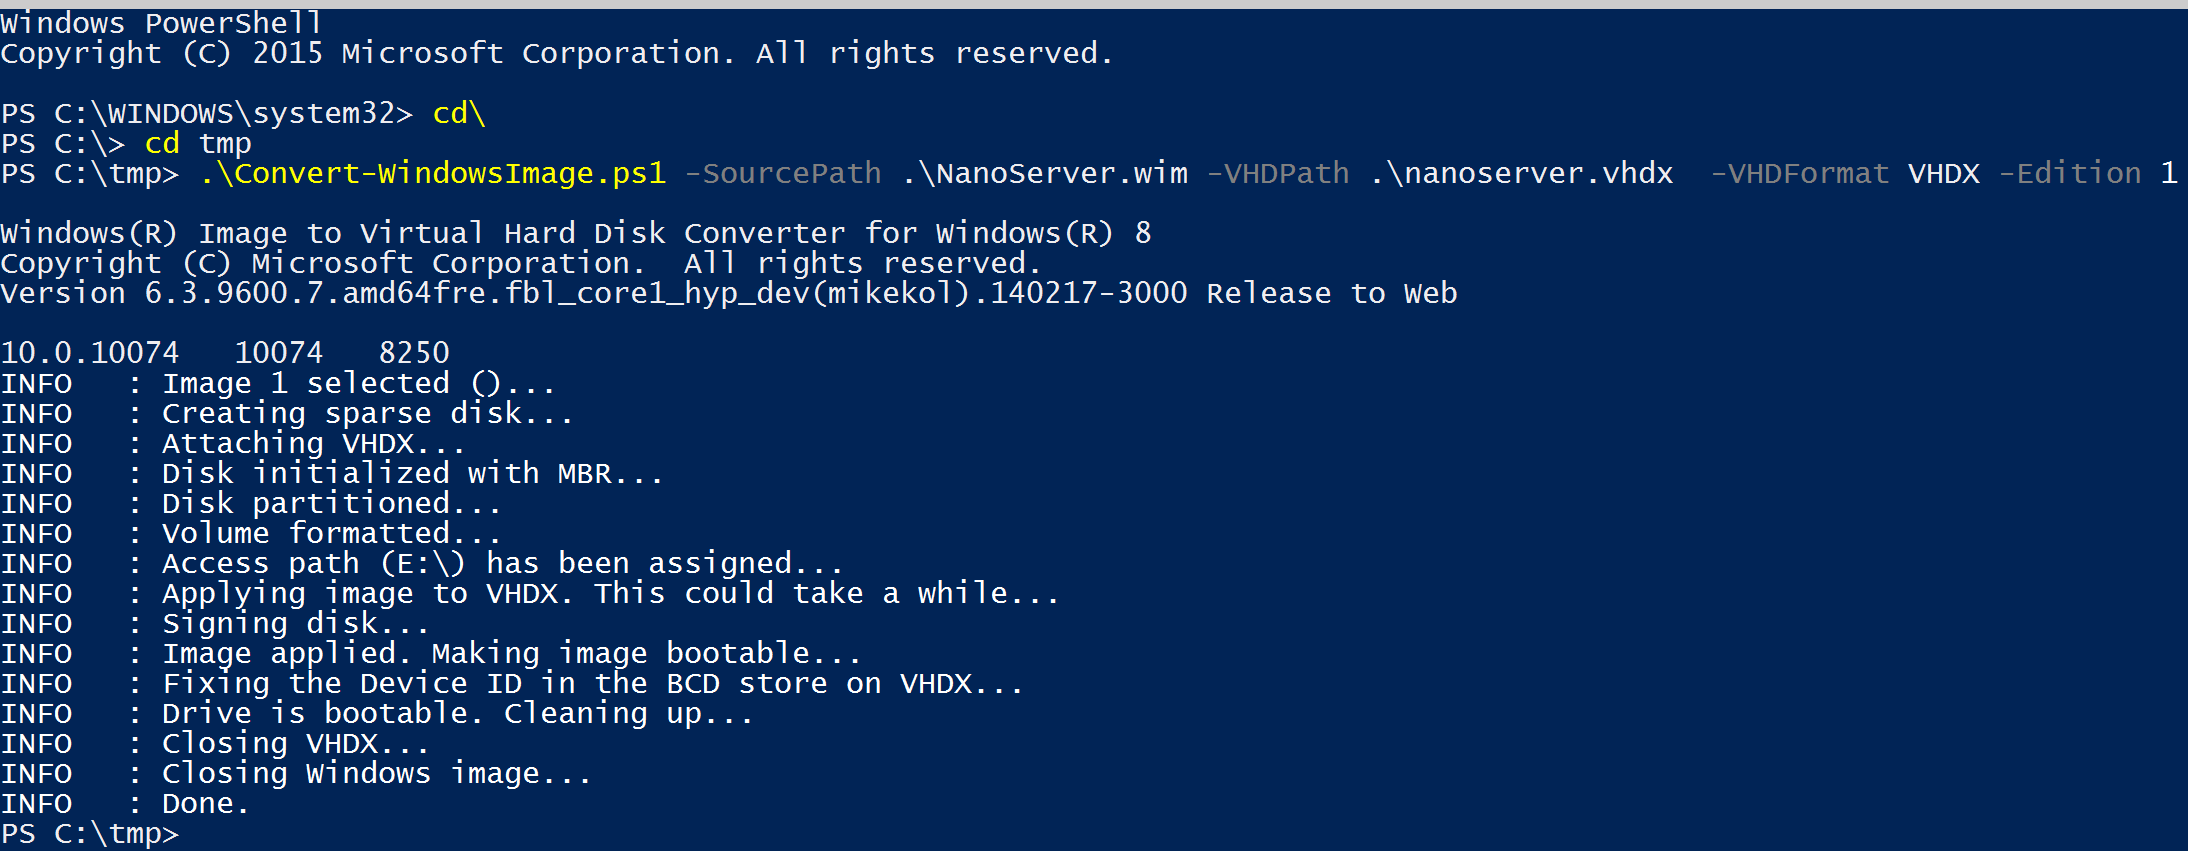
Note that while the current documentation specifies to use VHD I have found that VHDX also works fine, however you must use a generation 1 (the edition switch) file as generation 2 will not be recognised.
Make the answer file
Next I created a simple Unattend.xml to set the Machine name and Admin password during the machines first boot. Remember to set the values in the sections that say CHANGEME.
<?xml version='1.0' encoding='utf-8'?>
<unattend xmlns="urn:schemas-microsoft-com:unattend" xmlns:wcm="http://schemas.microsoft.com/WMIConfig/2002/State" xmlns:xsi="http://www.w3.org/2001/XMLSchema-instance">
  <settings pass="offlineServicing">
    <component name="Microsoft-Windows-Shell-Setup" processorArchitecture="amd64" publicKeyToken="31bf3856ad364e35" language="neutral" versionScope="nonSxS">
         <ComputerName>CHANGEME</ComputerName>
    </component>
  </settings>
  <settings pass="oobeSystem">
    <component name="Microsoft-Windows-Shell-Setup" processorArchitecture="amd64" publicKeyToken="31bf3856ad364e35" language="neutral" versionScope="nonSxS">
      <UserAccounts>
        <AdministratorPassword>
           <Value>CHANGEME</Value>
           <PlainText>true</PlainText>
        </AdministratorPassword>
      </UserAccounts>
      <TimeZone>CHANGEME</TimeZone>
    </component>
  </settings>
  <settings pass="specialize">
    <component name="Microsoft-Windows-Shell-Setup" processorArchitecture="amd64" publicKeyToken="31bf3856ad364e35" language="neutral" versionScope="nonSxS">
      <RegisteredOwner>CHANGEME</RegisteredOwner>
      <RegisteredOrganization>CHANGEME</RegisteredOrganization>
    </component>
  </settings>
</unattend>
Save your Unattend.xml along with the other files.
If you use notepad, make sure to change from ASCII to utf-8 or you may get some issues
SetupComplete.cmd
If you want the VM to have a static ip on first boot, create a file in your temp directory called SetupComplete.cmd and then add the following line making sure to replace the (CHANGEME) to your desired IP.
powershell.exe -command "Import-Module C:\windows\system32\windowspowershell\v1.0\Modules\Microsoft.PowerShell.Utility\Microsoft.PowerShell.Utility.psd1; Import-Module C:\windows\system32\WindowsPowerShell\v1.0\Modules\NetAdapter\NetAdapter.psd1; $ifa = (Get-NetAdapter).ifalias; netsh interface ip set address $ifa static (CHANGEME)"
Now the current documentation stipulates that you should copy various DISM components to the same temp directory under a dism folder, but as I was using the Windows 10 TP, I simply used the installed version.
Prepare the VHD
Next you will run the commands to inject the drivers, compute package and unattend.xml into the VHD you created, this is the bare minimum required to get nano up and running, if you want file storage/hyper-v/clustering you will need to add those as well.
md mountdir

dism /Mount-Image /ImageFile:.\nanoserver.vhdx /Index:1 /MountDir:.\mountdir

dism /Add-Package /PackagePath:.\packages\Microsoft-NanoServer-Compute-Package.cab /Image:.\mountdir

dism /Add-Package /PackagePath:.\packages\en-us\Microsoft-NanoServer-Compute-Package.cab /Image:.\mountdir

dism /Add-Package /PackagePath:.\packages\Microsoft-NanoServer-Guest-Package.cab /Image:.\mountdir

dism /image:.\mountdir /Apply-Unattend:.\Unattend.xml

md .\mountdir\windows\panther

copy .\Unattend.xml .\mountdir\windows\panther

md .\mountdir\Windows\Setup

md .\mountdir\Windows\Setup\Scripts

copy .\SetupComplete.cmd .\mountdir\Windows\Setup\Scripts

dism /Unmount-Image /MountDir:.\mountdir /Commit
If everything was setup correctly you should get an output like the following.
PS C:\tmp> md mountdir


Directory: C:\tmp


Mode                LastWriteTime         Length Name
----                -------------         ------ ----
d-----       08/05/2015     22:00                mountdir


PS C:\tmp>
PS C:\tmp> dism /Mount-Image /ImageFile:.\nanoserver.vhdx /Index:1 /MountDir:.\mountdir

Deployment Image Servicing and Management tool
Version: 10.0.10074.0

Mounting
[==========================100.0%==========================]
The operation completed successfully.
PS C:\tmp>
PS C:\tmp> dism /Add-Package /PackagePath:.\packages\Microsoft-NanoServer-Compute-Package.cab /Image:.\mountdir

Deployment Image Servicing and Management tool
Version: 10.0.10074.0

Image Version: 10.0.10074.0

Processing 1 of 1 - Adding package Microsoft-NanoServer-Compute-Package~31bf3856ad364e35~amd64~~10.0.10074.0
[==========================100.0%==========================]
The operation completed successfully.
PS C:\tmp>
PS C:\tmp> dism /Add-Package /PackagePath:.\packages\en-us\Microsoft-NanoServer-Compute-Package.cab /Image:.\mountdir

Deployment Image Servicing and Management tool
Version: 10.0.10074.0

Image Version: 10.0.10074.0

Processing 1 of 1 - Adding package Microsoft-NanoServer-Compute-Package~31bf3856ad364e35~amd64~en-US~10.0.10074.0
[==========================100.0%==========================]
The operation completed successfully.
PS C:\tmp>
PS C:\tmp> dism /Add-Package /PackagePath:.\packages\Microsoft-NanoServer-Guest-Package.cab /Image:.\mountdir

Deployment Image Servicing and Management tool
Version: 10.0.10074.0

Image Version: 10.0.10074.0

Processing 1 of 1 - Adding package Microsoft-NanoServer-Guest-Package~31bf3856ad364e35~amd64~en-US~10.0.10074.0
[==========================100.0%==========================]
The operation completed successfully.

PS C:\tmp> dism /image:.\mountdir /Apply-Unattend:.\Unattend.xml

Deployment Image Servicing and Management tool
Version: 10.0.10074.0

Image Version: 10.0.10074.0

The operation completed successfully.
PS C:\tmp>
PS C:\tmp> md .\mountdir\windows\panther


    Directory: C:\tmp\mountdir\windows


Mode                LastWriteTime         Length Name
----                -------------         ------ ----
d-----       08/05/2015     22:01                panther


PS C:\tmp>
PS C:\tmp> copy .\Unattend.xml .\mountdir\windows\panther
PS C:\tmp>
PS C:\tmp> dism /Unmount-Image /MountDir:.\mountdir /Commit

Deployment Image Servicing and Management tool
Version: 10.0.10074.0

Unmounting
[==========================100.0%==========================]
The operation completed successfully.
Attach to a VM
Now all that is left to do is create a VM to use the VHD that you just created. If everything worked properly you will be presented with a lovely flashing white bar.
Another thing I noticed is that dynamic memory does not yet appear to work
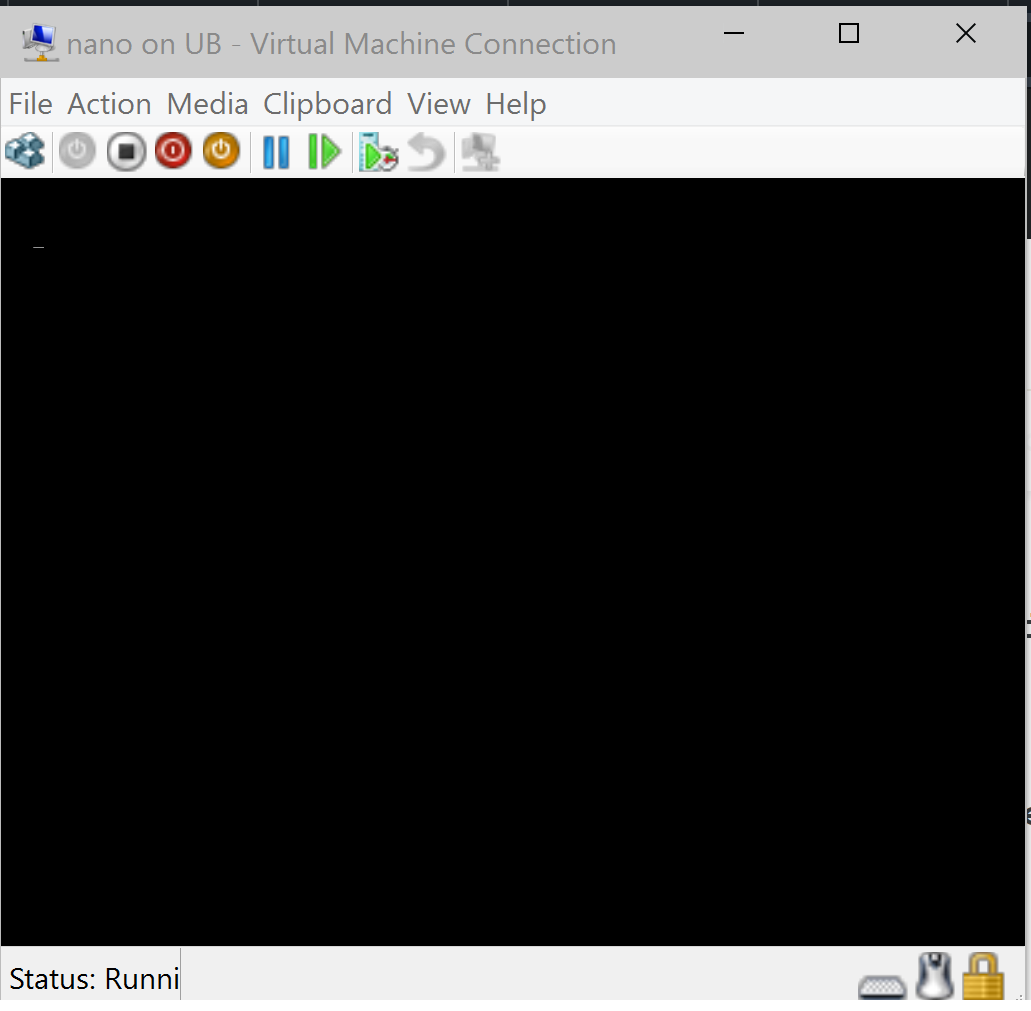
If you didn't know, Nano Server has no GUI at all, and this flashing white bar is all you will get if the server has booted correctly.
Get connected
Now that your Nano server is running you can connect to it as with any powershell remoting.
$cred = Get-Credential
New-PSSession -ComputerName "THE IP" -Credential $cred | Enter-PSSession
More Documentation
If you want to read more about using Nano server you can check out the TechNet article but be warned it does seem to be a little inaccurate.