IoT with Blazor on Raspberry Pi Part 1 - the KIT

I have a confession to make..... I love .NET Core. You might even call it a sort of obsession. Whilst I have programmed in many languages over the years (C, C++, Java, JavaScript, Rust, Python etc) and used many runtimes, C# and .NET have a special place in my heart.
It's easily the most productive environment for my style (yes I've used F#/VB as well), but until recently it had some significant limitations. If you wanted to do any device-level programming (aka IoT) then you were stuck with running on Windows IoT Core, which let's be honest, like the UWP apps it forces you to use, is a monumental failure.
So imagine my joy when .NET Core on ARM became a thing, and then more recently, adding native support for GPIO devices with System.Devices.Gpio!
Starting Kit
So you want to try this out? Well here is some starter kit you will need to prove basic functionality. This series assumes a Windows user. However, it should be mostly applicable to Linux/macOS users as well.
Already Know about Pi's?
If you are already familiar with how to set up a Pi and want to get to the Blazor part, you may wish to skip to Part 3
Raspberry Pi
Firstly, of course, you will need a Raspberry Pi! This one is a 4b 1GB with a SanDisk flash drive.

I've done this on a Pi 3, 3b+ and 4b, however it likely works on older models with slight alteration (pins), and of course the older models will be slower!
Flash Card
While you can cheap out on a flash card, DON'T DO IT! I've been using SanDisk Extreme Pro cards ever since compiling code on a Pi. With a lesser card, it sucks!
Yes, you can compile somewhere else and then transfer the compiled output of course, but that is more involved than what we are discussing here, and for the sake of a couple of quid (a few dollars for you American folk) it's unlikely to be worth the effort.
You will also require a way to 'image' this flash drive. Either a machine with an SD card reader (the SanDisk flash drives come with an adaptor) or a native MicroSD Card reader.
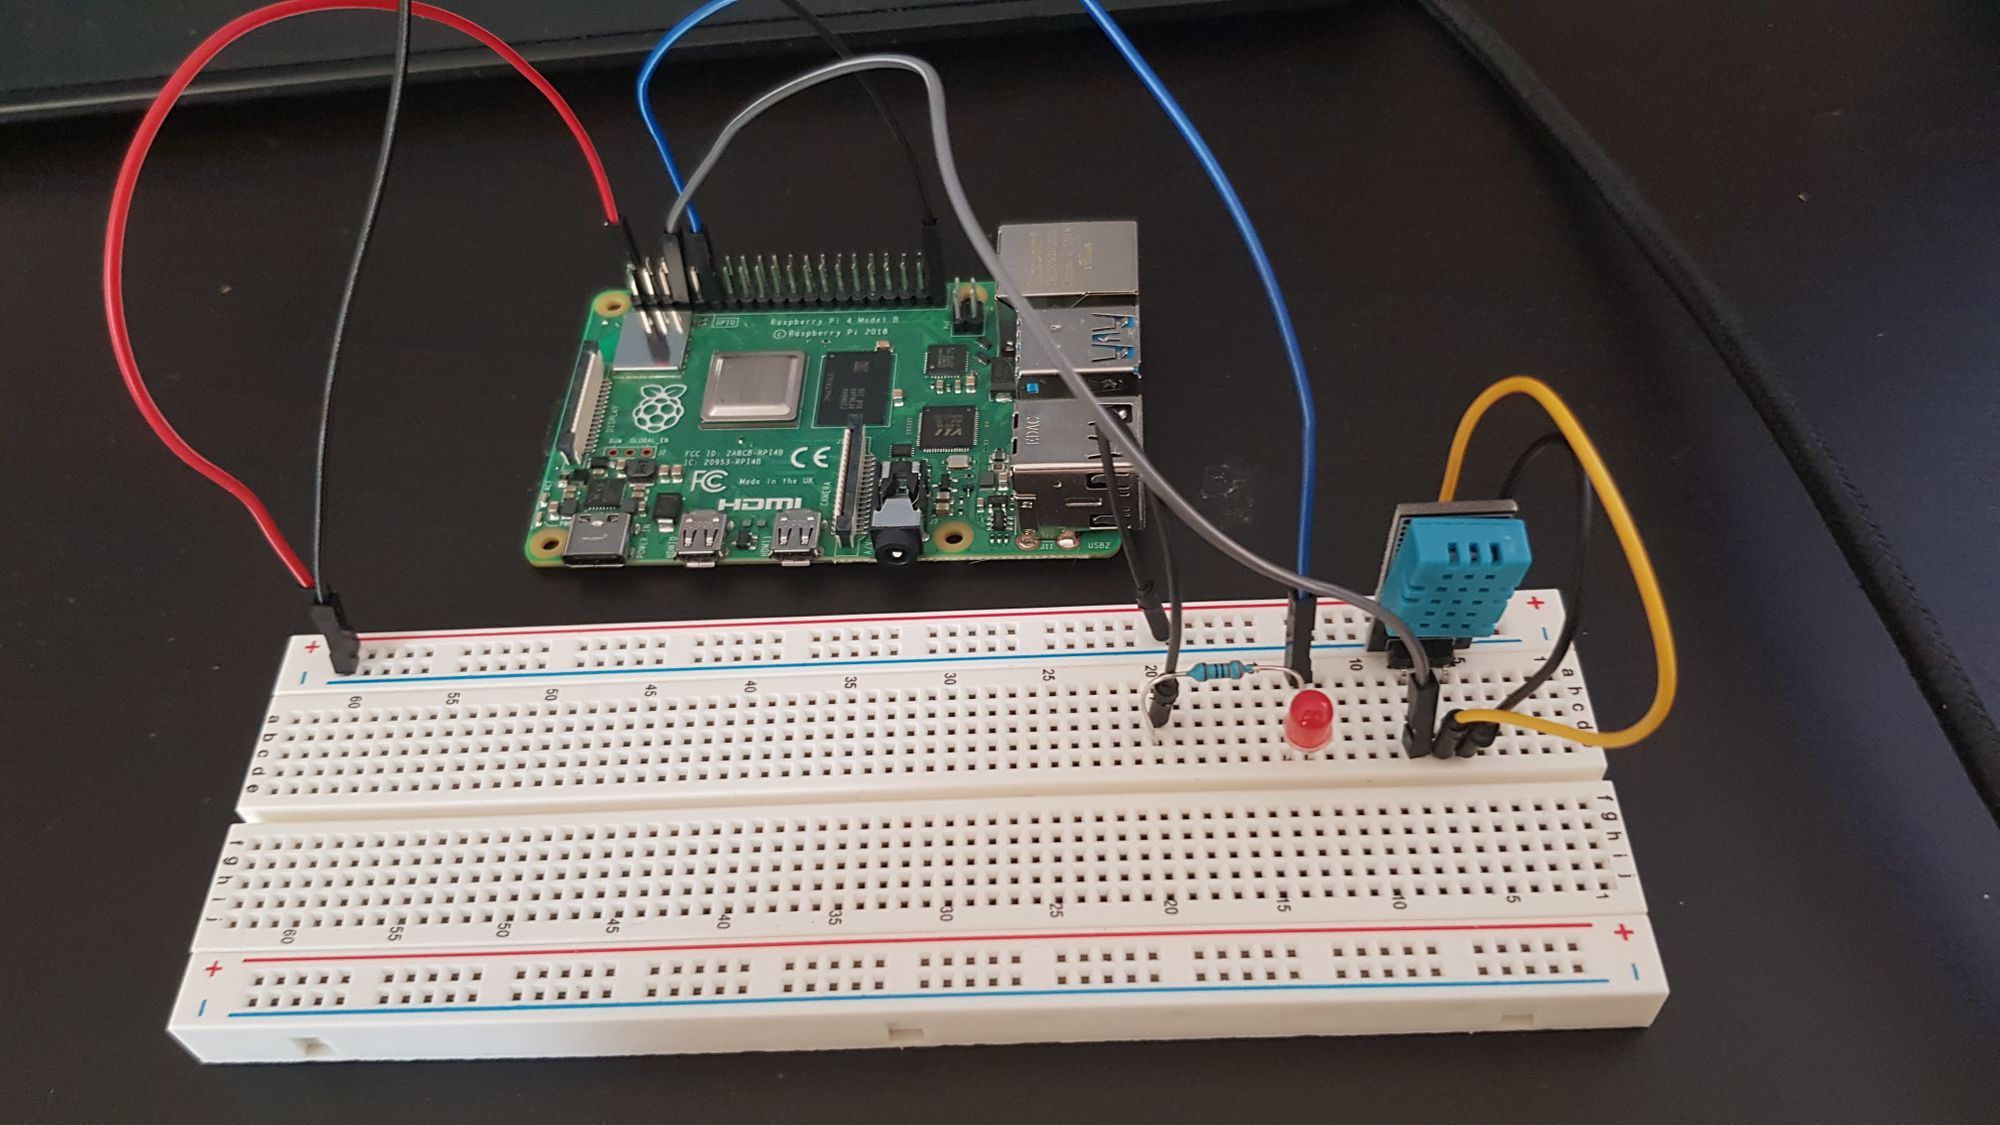
Some IoT Stuff
This wouldn't be an IoT event without some IoT devices attached to our Pi. To keep this more focused on the .NET Core side of things, I'm using some pretty simple POC (proof of concept) devices.
- An LED (and a 330Ω resistor) - this will prove basic switching control by allowing you to turn an LED on/off from your Pi.
- A DHT11 temperature and humidity module - demonstrating how to read GPIO input
- A breadboard
- Some GPIO cables
- A Touch Screen - this is completely optional, but just makes the experience more epic.
The quickest way to ensure you have the necessary devices and cables is to get the ELEGOO UNO R3 Starter Kit which has the added bonus of getting you an Arduino board as well.
Networking
You can do this purely with the Pi connected to Wi-Fi, but I highly recommend a wired connection for simplicity. Either way, configuring networking is well covered in other places so will not be explicitly covered in this series.
Other Bits
Your Pi will of course need power (micro USB < 4 or USBC > 4) but you may also find it easier to have a keyboard and mouse handy.
IDE
For this example I'm going to be using Visual Studio Code Insider, depending on when you read this post, you may be able to use the normal release version of VsCode.
Source Control
Why is this a point? Well! Let me tell you about the time I plugged the wrong cable into the wrong place on the breadboard and fried my Pi along with all its contents. I won't tell you which source control to use (cough cough, some flavour of git) but save yourself the trouble and just use something.
Part 2
"Wait, what! there was nothing about Blazor or .NET Core in this post!" Patience dear reader. With the list of what you will need out of the way, in Part 2 we will get it all setup and ready for coding!